Recipes POST HERE

Vegan Picadillo

Meat and potato dishes are created all over the world and in almost every cuisine.  As a child my favorite meat and potatoes dish was Picadillo.

Picadillo is a ground beef dish with potatoes, carrots, tomatillos, and a tomato chile paste.  It is rich and full of flavor.  Also, it is very versatile since you can eat it as is next to rice; add more liquid and make it into a soup; serve it in tacos; or use it to stuff quesadillas, enchiladas, and even poblano peppers. My favorite way to eat it is in tacos.

Today I present you the vegan version of Picadillo. Enjoy!


Serves approximately 2 people

Ingredients
1/2 cup dehydrated soy flakes
1 potato
2 carrots
3 tomatillos
1 tomato
1 small onion
1/4 cup guajillo paste (add two chiles de arbol to make it spicy)
4 tablespoons of corn oil
4 1/2 cups water
4 teaspoons salt
2 teaspoon cumin
2 teaspoon black pepper

- Bring 3 cups of water and 1 teaspoon of salt to a boil.
- In the meantime, chop all of the vegetables.
- Add the dehydrated soy flakes into the pot of water and hydrate for about 7 minutes.
- In a large skillet, heat the oil on medium low heat. Then add the potatoes and carrots. Cook for about 7 minutes.
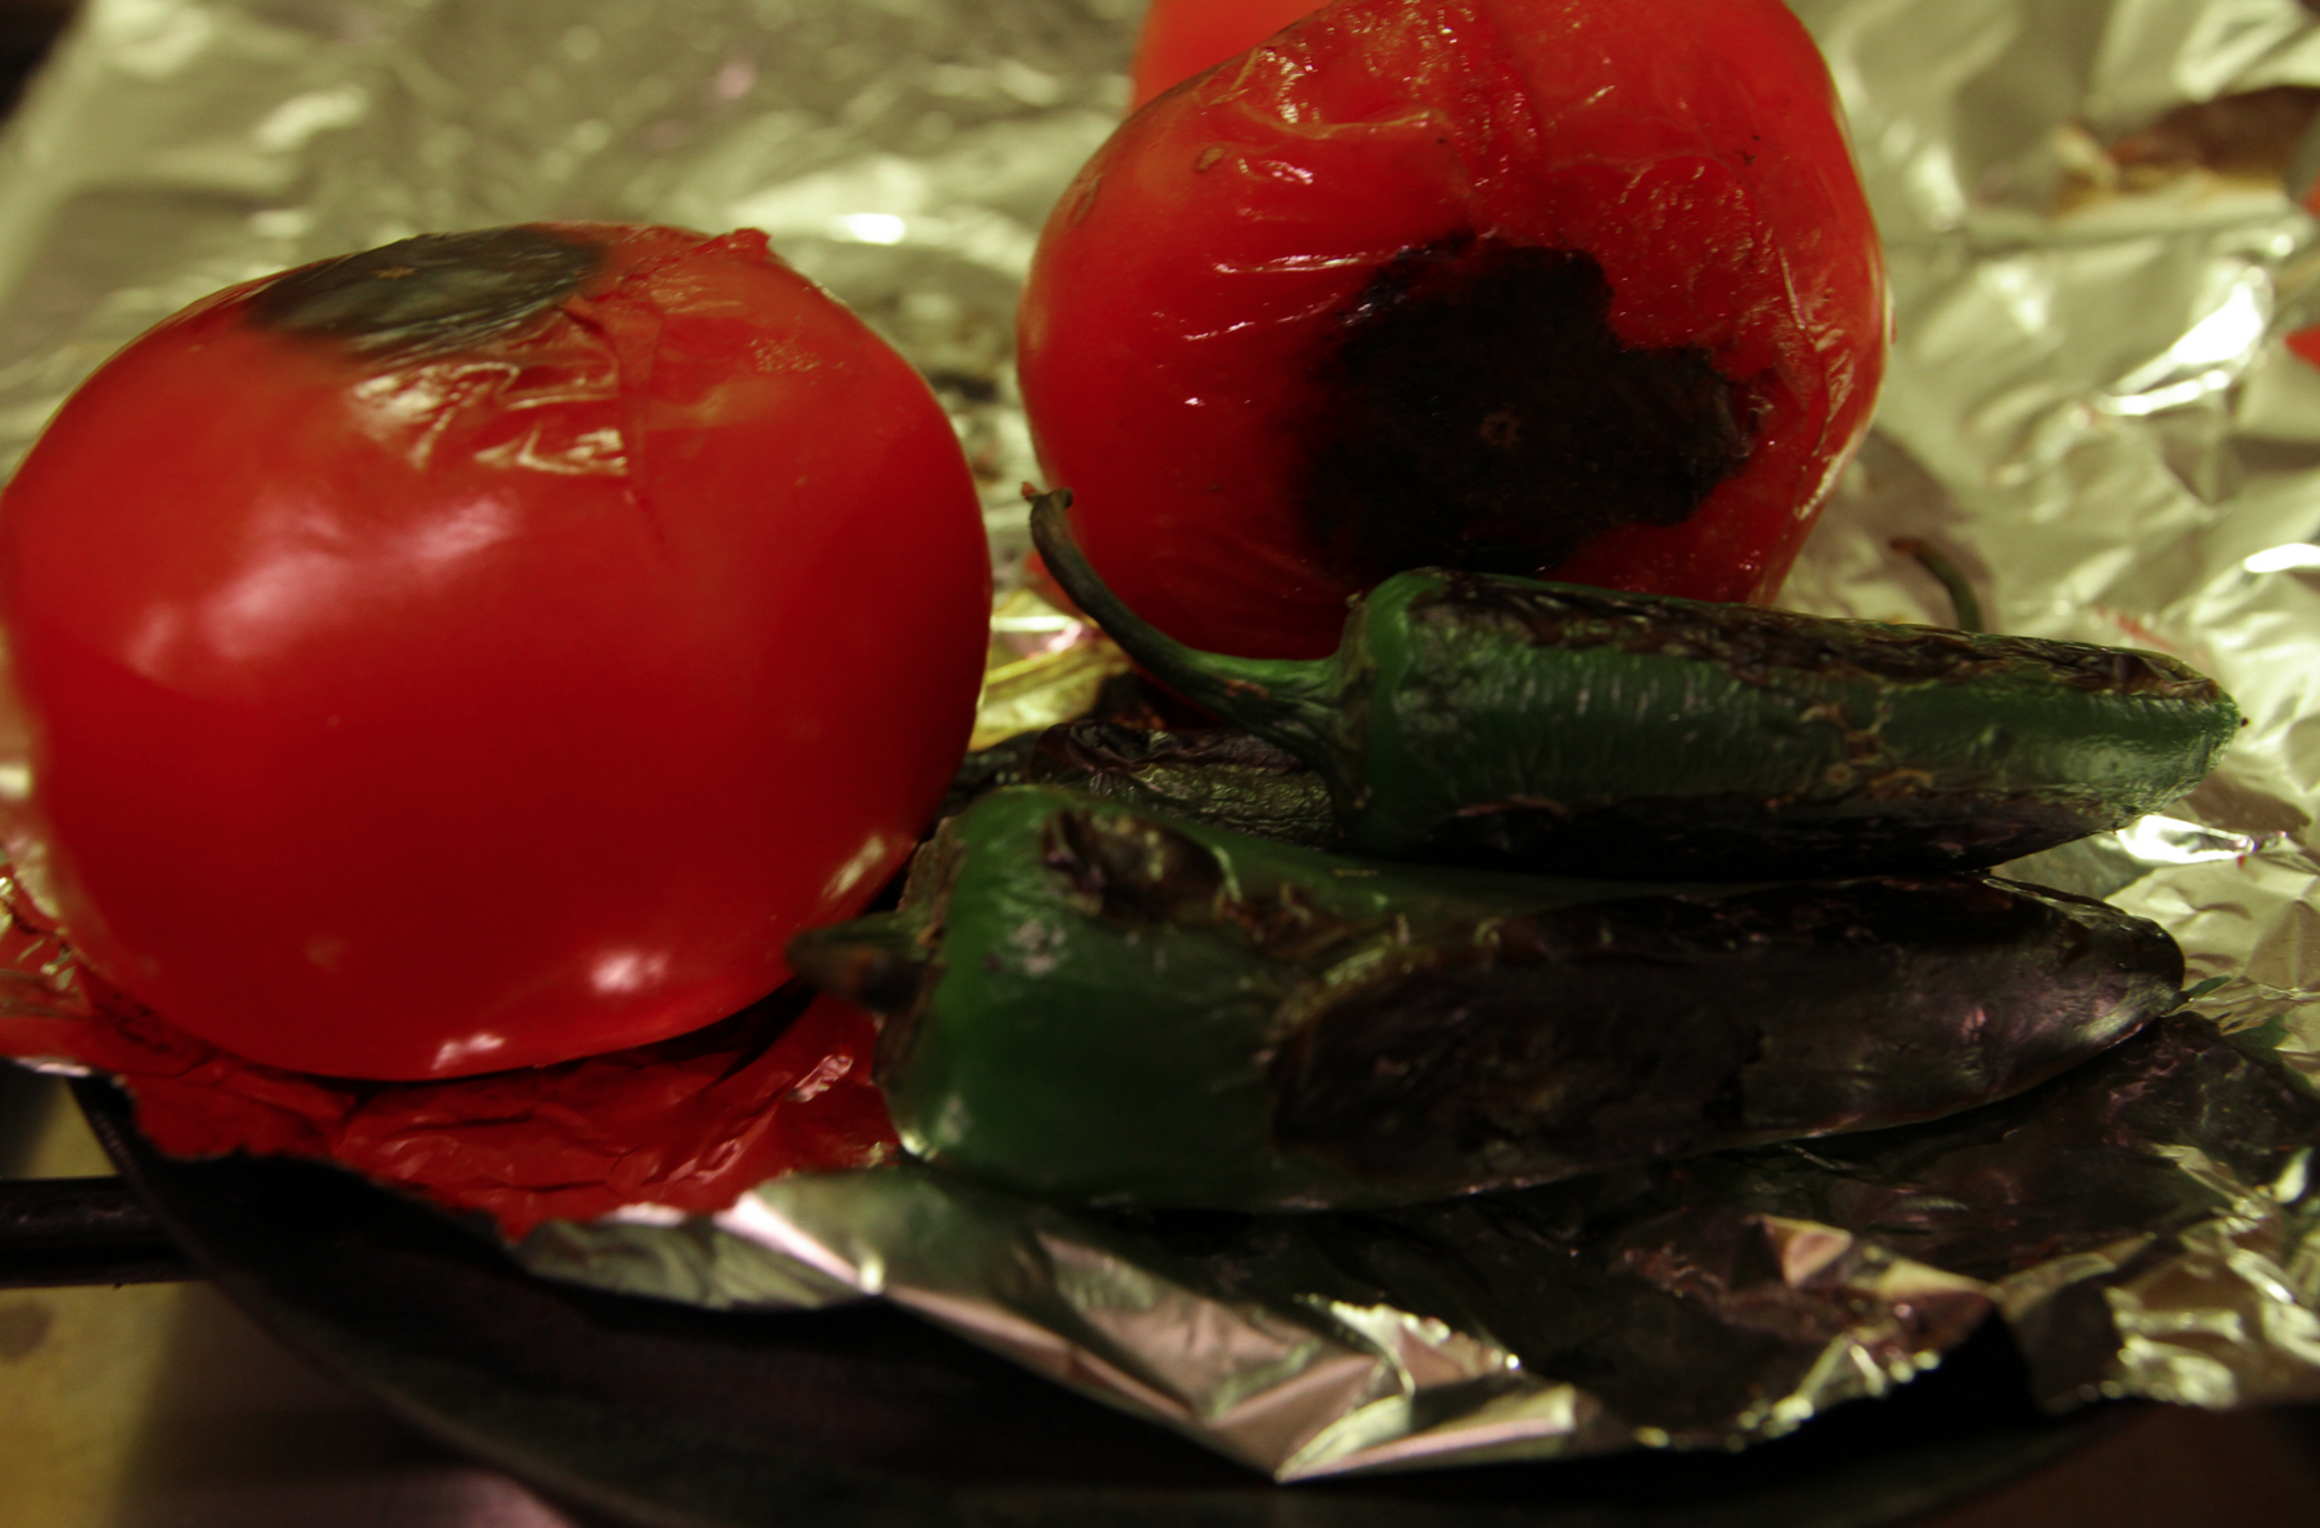
- Then add the onions, tomatoes, and tomatillos. Cook for another 3 minutes.
- Drain the now hydrated soy and squeeze all the water out using a cheese cloth (or strong paper napkin).
- Include the soy meat into the skillet with vegetables and cook for an additional 3 minutes. Adding black pepper, cumin, and the remaining salt.
- Finally, add the chile paste.  Add it to one area on the bottom of the pan first to sauté with the oils. Then mix well until it covers all of the other ingredients.
- Add 1 1/2 cups of water and simmer down to a thick sauce and until all the vegetables are fully cooked.

Done!

All of the flavors of a traditional beef picadillo are still present in this vegetarian dish making it perfect for anyone trying to omit meat (even if it’s for one day).

Provecho!


Feel free to post your comments or questions.

All content © 2013 AdrianaGuillen.com All rights reserved. You may not take any images or content from this site without written permission.

Rajas with Grilled Peppered Tofu

As the summer is still in full force and your grills are getting much attention I wanted to give you a yummy spicy side dish: Rajas.

Rajas are roasted poblano peppers that have been cooked with corn and some type of cream or cheese. I love crema agria but you can use sour cream, Crème fraîche, cream cheese, or any type of soft cheese. Regardless of what cream or cheese you use it will add a tangy and creamy flavor.

It is very common that you serve Rajas with a steak or carne asada. For us veggies I made a grilled peppered tofu!

Yields: approximately 2 servings

Ingredients:
1/2 block extra firm tofu
3 poblano peppers
1/2 small onion
1/2 cup yellow corn
1/4 crema agria
2 tablespoons olive oil
Salt and black pepper to taste
Nutritional yeast to taste
1 large lime

- Roast poblano peppers in broiler, open flame, grill, comal, skillet whatever is easiest for you. Roast them until they have blackened.
- In the meantime, drain, wash, and dry off tofu block.
- Cut tofu into 1/4 inch fillets. Sprinkle about 1/4 teaspoon fresh black pepper on each side and a dash of salt.
- Once peppers are roasted, drop into a plastic bag for about 1 minute. The steam will help to make it easier to remove the skins. Remove as much of the skins as possible.
- Place tofu fillets on the grill, grill pan, or comal. Make sure it’s really hot before you do so. Grill each side for about 3 minutes.
- Once tofu is done sprinkle nutritional yeast on each side while still hot.
- Grill corn and then remove kernels. If using frozen corn drop it into a hot skillet to char for about 3-5 minutes. Works almost the same.
- Cut poblano peppers open. Remove all seeds and veins if looking for a very mild taste. Then cut into 1/8 inch strips.
- In an extended skillet, heat the olive oil (over medium heat) then add corn and onions. Sauté for about 3 minutes.
- Now add the poblano strips and sauté for about another 3 minutes.
- Turn off the heat and add crema agria. Mix well until all of the items are incorporated. Add salt and pepper to taste.
- Lastly, add some lime juice to every piece of tofu and cut as you please.
- Serve immediately.

Spicy, sweet, smoky, and creamy.

Provecho!


Feel free to post your comments or questions.

All content © 2013 AdrianaGuillen.com All rights reserved. You may not take any images or content from this site without written permission.

Vegan Ceviche

I feel extremely thankful that my mom introduced me to many foods at a young age! My palate became diverse very early in my life.  When most children are asking for candy I was asking for ceviches and shrimp cocktails.  Although we had ponds where we fished in my village, my favorite ceviche was still from the street stands in the small town near us.

We would travel many miles of dirt road, often by foot, then caught a ride from a family member and traveled some more to get to the nearest town. It was an entire day’s jouney. While my mom shopped for spices and groceries that we didn’t have in the village, my older sister Lorena and I would sit and eat ceviches and shrimp cocktails from a street vendor my mom trusted. I was only three but I appreciated every flavor and emotion that came from indulging in the best ceviche I’ve ever had.

When I became vegetarian I had to say goodbye to ceviche. While I don’t ever crave beef, poultry, or any other kind of meat I do often miss fish, specially ceviche and shrimp cocktails. While talking to my sister Lorena the other day, she shared that a friend of friend had used textured soy to make a ceviche. We didn’t have a recipe but we sat on the phone and shared ideas on how to make it. So, here is my version of a vegan ceviche with a lot of input from another amazing home cook: my sister Lorena!

As a side note: I find it so refreshing that my sister has shared the same love of food that our mom shared with us, with my niece.  Since she was only 2 she was already eating sushi and would look at octopus and say “Yum, Pulpo.”  Thank you Lorena for being an inspiration.

Yields: approximately 8 tostadas

Ingredients for dehydrated soy:
1 cup dehydrated soy flakes
1/4 white onion
2 garlic cloves
2 bay leaves
6 peppercorns
2 teaspoons coarse salt

Ingredients for ceviche:
1/2 white onion
2 roma tomatoes
1 cup cilantro
2 serrano chiles
3 limes
2 teaspoons salt (or less)
3 avocados

Ingredients for tostadas:
8 Tortillas
1/4 cup oil

Cooking soy
- Bring 8 cups of water to a boil.
- Add onion, garlic cloves, bay leaves, peppercorns, and coarse salt.
- Boil for about 5 minutes and add dehydrated soy.
- Cook for about 7-10 minutes so that the flavor can be absorbed.

While the tofu is cooking work on the rest of the ingredients.

- Chop the tomato, onion, serrano chiles, and cilantro.
- Place the chopped ingredients into a food processor.
- Pulse three times, mix, then pulse another three times. The ingredients should be a little larger than minced.
- Remove ingredients from food processor into a large mixing bowl (glass or plastic).
- By this time the soy should be cooked. Therefore, remove onion, garlic, and peppercorns and drain completely. You don’t want any juice to remain.
- Add the hydrated soy to the bowl and add the lime juice and salt to taste. Mix well.
- Allow ceviche to cool in the refrigerator for at least 15 minutes.

You can eat this with corn chips or tostadas. I prefer to make my own tostadas at home to avoid crazy ingredients or preservatives. Here is how:
- Bring oil to 350 degrees.
- Slowly and carefully place a cold tortilla into the oil.
- Press down with a spatula, to cook evenly, for about 30 seconds.
- Flip tortilla and press down with spatula for approximately 30 seconds. Tortilla should be crispy and golden on both sides.
- Remove from oil and place in paper towels to absorb remaining oil.

Now all you have to do is plate your tostadas as you wish.
- I like to put a little bit of Mexican lime mayo or crema (but that will make them not vegan of course) on my tostada first.
- Spread the ceviche on the tostada.
- Add slices of avocado.

Provecho!!

Feel free to post your comments or questions.

All content © 2013 AdrianaGuillen.com All rights reserved. You may not take any images or content from this site without written permission.

Cilantro and Roasted Jalapeño Hummus

Every once in a while I like to give your recipes that are Mexican yet involve one or two ingredients that are not. For example you might remember the Vegetarian Mexican Sushi Roll and Tofu Al Mojo de Ajo. Today I present you another one of these recipes: Cilantro and Roasted Jalapeño Hummus.

I know hummus is not Mexican but when you look at my ingredients you find that it’s pretty close to a salsa. I simply substituted the tomatoes for garbanzo beans. Plus, who does’t like hummus? Enjoy!

Yields: approximately 2 cups

Ingredients:
1 1/2 cup cooked garbanzo (chickpea) beans
1 cup cilantro
1 1/2 jalapeños (or less for less heat)
1 garlic
2 tablespoons toasted sesame seeds (or 1 tablespoon tahini paste)
1/4 cup lime juice
2 tablespoons garbanzo cooking liquid
1 tablespoon extra virgin olive oil
1 tablespoon lemon infused olive oil
1 teaspoon sea salt

- Roast the jalapeño and garlic on a comal, skillet, or broiler. Remove when they are charred on all sides. Then remove as much skin as possible.
- Place all ingredients in a food processor and blend until you achieve a smooth consistency.

That’s it! How easy, right?

I like to eat my hummus with thick flour tortillas. Only if I make them at home though, I don’t like processed tortillas. So here is my quick Tortilla Bread recipe.

Yields: approximately 10 small tortillas
Ingredients for Tortilla Bread recipe:
1 cup flour
1 tablespoon oil
1/2 cup water
1/4 teaspoon salt
Plus approximately 1/2 cup flour to knead

- Mix flour and salt first. Then add water and oil.
- If dough is too sticky add more flour, one tablespoon at a time, until you reach a sticky soft dough.
- Knead for about 5 minutes until dough is soft.
- Separate dough into 10 small balls.
- Using a rolling pin, roll the balls of dough until they are about 1/8th inch thick and round.
- Cook on a comal or skillet for about 1 minute on each side under medium-low heat. If using the comal allow them to have a little bit of char.

Yum! So delicious!!


Feel free to post your comments or questions.

All content © 2013 AdrianaGuillen.com All rights reserved. You may not take any images or content from this site without written permission.

Chile Seco Relleno

A chile relleno simply means stuffed pepper. The traditional chile relleno most is a poblano pepper stuffed with cheese and coated with an egg batter then fried. Although extremely delicious (and vegetarian) I wanted to share a different kind of chile relleno.

I was inspired by Southern Mexican cuisine and their use of plantains. So I took a dry chile ancho (which is the dry and smoked version of a poblano) and stuffed it with black beans, rice, and plantains. Finally I topped the chile with a creamy cilantro sauce.

You should expect a smokey, spicy, and sweet combination. Completely vegetarian, but could be vegan if vegan mayo is used. I hope you enjoy!

Yields: approximately 6 chiles

Ingredients for rice:
1 cup rice
2 whole garlic
2 cups water
1 teaspoon salt
1/2 cup roughly chopped onion
Pinch of saffron

Ingredients for beans:
2 cups cooked black beans
1/3 cup chopped onions
1/3 cup chopped green bell pepper
1/3 cup chopped red bell pepper
2 cloves of garlic
1 tablespoon chopped jalapeño
3 tablespoons oil
1/2 cup water
3 bay leaves
2 teaspoons cumin
1/2 teaspoon oregano
1/2 teaspoon black pepper
1/2 teaspoon salt (depending on pre-cooked beans

Ingredients for Plantains:
1 cup coconut oil
2 very ripe plantains

Ingredients for cilantro sauce:
2 cups cilantro
1 1/2 jalapeños
1 tablespoon onion
3 garlic
2 tablespoons mayo (substitute w/vegan mayo for vegan)
1 tablespoon apple cider vinegar
1/4 cup water
2 teaspoons black pepper
1 teaspoon salt

Ingredients for chiles:
6 chiles ancho
3 cups water
1/4 cup shaved piloncillo

Begin with your rice first:
- Wash rice and place in pot with water, onion, garlic, saffron, and salt.
- Bring to a boil and lower heat. – Cook with lid on for about 15 minutes, until water has dissolved completely.
- Turn off heat and let it sit until ready to serve. Don’t open lid, so rice can become fluffy.

While your rice is cooking start your beans:
- Heat oil in a deep pan and add onions. Sweat the onions under low heat for about two minutes.
- Add garlic and sauté for about 1 minute. Then add jalapeño, green bell pepper and red bell pepper and sauté for about 3 minutes.
- Now add black beans and incorporate with al the ingredients for about 2 minutes. Then add water, bay leaves, cumin, black pepper, oregano, and salt if needed.
- Cook beans for about 20 minutes under low heat.

By now the rice should be ready and resting. Fry the plantains while the beans are cooking:
- Heat the coconut oil at about 300 degrees, not too high or the plantains will burn very quickly.
- Cut your plantain by half (lengthwise) and then cut into 8ths.
- Place the plantain pieces in the coconut oil and fry for about 3 minutes on each side. They will look very golden brown when ready.
- Set aside on a paper towel to remove excess oil. Then chop into small cubes.

While the beans are finishing make the creamy cilantro sauce:
- Place all ingredients (cilantro, onion, garlic, jalapeño, mayo, vinegar, water, salt, and black pepper) in a blender and blend until smooth and creamy.

The last step is the chiles:
- Bring water to a boil and add piloncillo.
- Lower heat and add chiles. Soak chiles for about 7 minutes. They should be soft but still hold together.
- Make a slit lengthwise and carefully remove seeds and veins.

Everything will be ready by now, so you are ready to plate!
- Stuff the chile with beans, rice, and plantains.
- Finish off with the cilantro sauce

So delicious and filling! Provecho!


Feel free to post your comments or questions.

All content © 2013 AdrianaGuillen.com All rights reserved. You may not take any images or content from this site without written permission.


Nopales Hash (Nopales con Papa)

I have come to the conclusion that my Nopales (prickly pear cactus) Soup will be the dish that people will remember me by.

It brings a smile to my face to know that more and more people are becoming knowledgeable of what this delicious and nutritious ingredient is all about.  As not many people know howto work with this ingredient and since I keep getting asked about other ways to eat it, I decided to share this very simple nopales recipe: Nopales con Papa.

This is a perfect side dish to any meal you would normally eat with potatoes. As a vegetarian or vegan, you can serve it next to your favorite type of beans and eat with corn tortillas to make a complete meal. For some heat eat eat with a pickled jalapeño.

Servings: approximately 4

Ingredients
2 prickly pear cactus pads
1 large potato
2 small onions
4 cloves of garlic
1 quart of water
2 tomatillo husks
2 teaspoon salt
1 teaspoon garlic powder
Pinch of dried oregano
1/4 teaspoon black pepper
2 tablespoons of corn oil
Cilantro for garnish

- Buy cactus pads that have all the spines removed.
- Dice cactus pads and place in a pot with the water. Add one roughly chopped onion, all cloves of garlic, and 1 teaspoon salt. Bring to a boil and cover. Cook for about 15 minutes, until the cactus is soft.
- In the meantime, dice the potato and the remaining onion.
- In an extended pan heat the corn oil and add the potatoes. Cook under low heat.
- After about 5 minutes add the onions and continue cooking.
- By now, the cactus should be cooked. Drain all the liquid and remove the onion and garlic that was cooked with the cactus.
- Add the cactus to the potatoes and continue cooking on low heat.
- Now add the garlic powder, 1 teaspoon of salt, black pepper, and oregano.
- Continue cooking for approximately 5 minutes or until the potatoes are fully cooked.
- To serve sprinkle fresh chopped cilantro.

Provecho!


Feel free to post your comments or questions.

All content © 2013 AdrianaGuillen.com All rights reserved. You may not take any images or content from this site without written permission.

Torta de Chayote

Last weekend I had the opportunity to go to the American Museum of Natural History and explore a special exhibition called “Our Global Kitchen.”  More specifically they had a special section of a replica of an Aztec Market as it was back in 1541 (not sure why that year).  As I came across that I got the chills. Almost every single ingredient there, was something I grew up eating; a lot. I have always known that I must have been part Aztec but I never knew that their cuisine was imbedded in me.

One ingredient that I stood out and was highly talked about was the Chayote. This is a vegetable similar to a squash that is native to Mexico.  My mom grew these in our garden and I would eat them very often. It was just so special to learn more about my ancestors and find that my cuisine in 2013 is still being influenced by the Aztec cuisine from 1541!

As a tribute to my Aztec roots I decided to create a torta that any vegetarian would love that is high on potassium, fiber, protein, and many other vitamins and minerals using a Chayote.

These are easy to find now a days in Hispanic markets and I often see them in Asian markets as well.

Yields: approximately 4 tortas

Ingredients:
2 chayotes
1/2 cup Italian bread crumbs
1/2 cup Panko crumbs
1 teaspoon onion powder
1 teaspoon garlic powder
1/2 teaspoon sweet paprika
1/2 teaspoon black pepper
1 teaspoon pink Hymalian salt
1 egg
1 tablespoon Nutrition Yeast
2 tablespoons of corn startch
2 avocados
1 red onion
1 lime
4 jalpeños en escabeche
1 cup refried Mayocoba beans
4 torta breads (telera or bolillo)

- Slice your red onion very thinly and place in a bowl with water for about 5 minutes. Then remove water and add the juice of one lime plus a pinch of salt. Let it sit to pickle.
- Mix all bread crumbs, onion powder, garlic powder, sweet paprika, black pepper, salt, and nutritional yeast.
- Beat your egg in a separate plate and set aside.
- Slice your chayote into 1/4 inch thick rounds. Dry off excess water on both sides. Then dust all of them with the corn starch. This will keep the moisture inside the chayote and away from the breading so that it doesn’t become slimy.
- Dip, one chayote round at a time, into the egg mixture and then coat it with the breading.
- Place chayote patties on a lightly oil coated baking sheet.

- Once all chayote patties are ready, cook in a 350 degree oven for approximately 40 minutes. Until the breading is crispy and the inside of the chayotes are cooked. They should be crispy on the outside yet soft like a squash on the inside, but firm.
- You can also fry your chayote patties. They are quite delicious fried yet less healthy.
- Smash your avocados to the point it creates a chunky paste. Add a pinch of salt and some lime juice so that it doesn’t oxidize so quickly.
- Slice, lengthwise, some jalapeños en escabeche.
- Cut your torta bread in half. Spread your smashed Mayocoba beans on the bottom half of the bread and the avocado on the other half.
- Place one or two chayote patties on your bottom torta bread with beans. Then add the pickled red onions. Top with the jalapeños and place the top half of the bread with avocado on top.

Wow! These are so yummy. A great vegetarian torta and even an alternative to a veggie burger.

Provecho!


Feel free to post your comments or questions.

All content © 2013 AdrianaGuillen.com All rights reserved. You may not take any images or content from this site without written permission.

Ensalada de Frijol y Rábanos con Vinagreta de Jalapeño (Bean and Radish Salad with a Roasted Jalapeño Vinaigrette)

If you have followed my Instagram, you have probably read that for some bizarre reason I have been receiving Bon Appétit Magazines. I have never ordered them yet they keep appearing in my name. Regardless, I am extremely thankful for this! These magazines have been inspiring me.

One special recipe, of the April 2013 issue really spoke to me: White Bean and Radish Salad. It looked delicious yet I thought “how great would this be in a Mexican version with some nice heat.” So here is my Ensalada de Frijol y  Rábanos con Vinagreta de Jalapeño

Yields: approximately 4 servings

Ingredients:

2 cups Mayocoba beans (no liquid)
3 radishes
3 scallions
1 jalapeño
1 clove of garlic
1/4 avocado
1 tablespoon chopped cilantro
1/2 teaspoon pink Himalayan salt
1/2 teaspoon black pepper
3 tablespoons lemon infused olive oil
5 tablespoons extra virgin olive oil
1/2 lime

- Cook Mayocoba beans as instructed on my previous post.

- Roast a jalapeño and garlic as desired on a pan, over open fire, broiler, grill, etc.

- Cut the radishes in half then slice thinly.  Place in a bowl with cold water and about 1/4 teaspoon salt. This method will remove the spiciness from the radishes.

- Thinly slice your scallions.

- Remove the black skin from the jalapeños and garlic and place in food processor. Use half of the jalapeño for less heat.

- Add the olive oils to the food processor along with the salt, black pepper, avocado, and the juice of half a lime.  Process until you acquire a very smooth consistency and everything is incorporated.

- In a bowl mix your beans, radishes, scallions, and chopped cilantro.

- When ready to eat add the lemon lime jalapeño vinagrete.

I love Mayocoba beans but if you would prefer to use other beans this recipe can still work. Try using white beans, even black beans.  This will be a great new way to prepare your bean salad as a side dish for many entrees.

Provecho!


Feel free to post your comments or questions.

All content © 2013 AdrianaGuillen.com All rights reserved. You may not take any images or content from this site without written permission.

Jalapeños en Escabeche

My lovely mom always tells me the story of a time when I was three years old and she took me to the doctor.  I was ill with some sort of stomach problem and the doctor put me on a medication.  My mom almost embarrassed asked the doctor “Can she eat chiles with this medication?” Laughing, the doctor responded “Like a good Mexican, she can’t eat unless she has her chiles.” In the end I was able to eat my chiles, thank goodness, but I don’t think that it was normal for me to love chiles at three years old.

Obviously, my love for spicy foods began at a very early age and this love has never ended. I specially love pickled jalapeños and there is nothing better than making them at home. Allow me to share this amazing recipe for Jalapeños en Escabeche.

Yields: approximately 1, 28 oz jar

Ingredients:
10 jalapeños
1 small onion
1 small carrot
5 cloves of garlic
10 peppercorns
2 cloves
4 bayleaves
1 tablespoon of brown sugar
2 teaspoons of salt
1 cup white vinegar
1 cup water
1/3 cup corn oil

- Wash jalapeños throughly. Using a toothpick make several small holes on every jalapeño. This will allow all the flavor to really penetrate each pepper.
- Thinly slice carrots into 1/8 of an inch slices.
- Thinly slice onions as well.
- In a pot, add oil and jalapeños, cooking under low heat. Make sure to stir often. What you are trying to do is slightly fry the jalapeños before they pickle in the vinegar. This method allows the natural oil from the peppers to be released intensifying the flavor.
- After about 5 minutes add your carrots and onions.
- Fry all ingredients for about another 5 minutes.
- Turn off heat and add water, vinegar, and all the spices.
- Transfer on to a glass jar and let it cool down.
- Once everything has cooled down, keep in your refrigerator for at least 3 days without opening. All of the flavors will intensify. If you try to eat them before they will be too acidic.
- Now they are ready to eat!

This will be more spicy than your regular store bought jalapeños but a lot more flavorful.

Moreover, if you want to can these peppers all you have to do after you pour the contents in the jars and close the lids is:
- Boil the jars
- Remove and cool until you hear the pop-pop-pops of the seals forming.

Enjoy!


Feel free to post your comments or questions.

All content © 2013 AdrianaGuillen.com All rights reserved. You may not take any images or content from this site without written permission.

Photos by Adrian Davila

Tofu al Mojo de Ajo

First, thank you to all whom have served this beautiful country. Although I am not a natural born citizen of the United States, I am forever grateful for the beauty and success that this country has provided me. Therefore, thank you, thank you, thank you for all the brave souls who have put their life on the line for this mesmerizing country.

While most of America is grilling today I will be using my comal instead. I live in the middle of NYC and I have no grill. Therefore, I improvise with my handy comal and trust me it gives anything a great flavor.

Mojo de Ajo simply means “in a bath of garlic” and it is a very popular sauce used all over Mexico. You often find it with seafood but I have decided to make it my own today by using it on tofu. I wanted something other than a regular BBQ sauce on this day and of course a touch of my Mexico in the recipe. In addition, this sauce is so good that you can use it on anything: lobster, steak, shrimp, any fish, etc. If you are vegetarian/vegan then this will be a new dish you can add to those grilling days!

I hope you enjoy.

Yields: approximately 4 plates

Ingredients for Tofu:
1 block of organic, non-GMO, extra firm tofu
1/3 cup extra virgin olive oil
5 cloves of garlic
1/3 cup vegetable broth
1 chipotle in adobo
1/2 teaspoon of black pepper
1/2 teaspoon of salt
1 tablespoon lime juice

Ingredients for Brown Rice Salad:
1 cup brown rice
2 quarts water
1 orange bell pepper
1 tomato
1 small onion
3 tablespoons chopped cilantro
1 large lime
1/2 teaspoon of cumin
1/2 teaspoon of black pepper
1 pinch of sweet paprika
Salt to taste

- Drain, wash, and dry your tofu very throughly. You want it to be very dry before it hits the comal or grill. Cut it into 1/4 inch slices. The dry it some more by placing on paper towels.
- Bring 2 quarts of water to a boil and add your brown rice. I have found that this is the best way to cook brown rice perfectly every time. Lower the heat to low/medium and allow the rice to cook. In about 25 minutes your rice will be cooked and all you will have to do is drain all the water. Perfect brown rice in no time.
- While you give your tofu enough time to dry, slightly smash your garlic cloves and add them to your olive oil in a small pan. Under low heat, allow the cloves to release flavor until they are slightly golden. Once golden, remove from heat and cool off.

- Chop all your vegetables in the meantime: tomato, onion, and bell pepper. Place in a bowl and add the juice of a large lime.
- By now, your olive oil should be cooled enough. In a food processor, place your olive oil, garlic cloves, vegetable broth, chipotle, black pepper, salt, and lime juice. Then blend all of the ingredients until very smooth. Place aside on a bowl.
- Your rice should be cooked by now and drained off. You are now ready to add all of the chopped vegetables with lime juice to the brown rice. Now add cumin, black pepper, sweet paprika, salt, and top with chopped cilantro. Mix well.
- Now on to the tofu. Brush some regular olive oil and a pinch of salt to both sides. Then place on comal or grill under medium heat. Do not turn until edges are starting to show a golden color (about 4 minutes). Flip tofu and grill the second side (about another 4 minutes). Remove from heat.
- As soon as you remove the tofu from the heat smother, yes smother, your mojo de ajo sauce on both sides. Rest tofu in sauce for about 5 minutes, flip, and add more sauce. I have found that this method allows the tofu to gather great taste, yet it still keeps the texture and taste of the grill without burning it. If you marinate tofu before grilling it for some reason it never acquires a grilled texture very well.
- Keep tofu in a warm place until you are ready to serve. Brown rice salad should be cold.

Provecho!


Feel free to post your comments or questions.

All content © 2013 AdrianaGuillen.com All rights reserved. You may not take any images or content from this site without written permission.

Mexican Vegetarian Sushi Roll

In honor of his birthday, yesterday, here is the recipe of his favorite food that I make: Mexican Vegetarian Sushi.

I decided to become vegetarian to not support factory farming practices; secondly because I love animals and could never kill one myself; and lastly to be more healthy. As a result of this you would think that I miss meat, but I really don’t. The only thing I really miss is fish, specially in sushi! The only two reasons I choose to stay vegetarian and not become pescetarian is to not support the deterioration of our seas and because the alternative (fishing farms) is just too cruel and unhealthy. Luckily, I created a solution to my sushi craving: recipe for vegetarian sushi.

My vegetarian sushi won’t be found in a restaurant, has mexican ingredients, and it’s truly vegan, except for the spicy mayo. It is also a nice alternative for non-shushi-lovers. Trust me on this, this sushi has turned many non-shushi-lovers into sushi cravers. I hope you enjoy it!

Yields: approximately 4 maki rolls

Ingredients:
1 cup sushi rice
1 1/4 water
2 tablespoons of sushi vinegar (if you can’t find, use rice vinegar with a pinch of salt and sugar)
1/2 cup chopped onion
1/2 cup chopped cilantro
1/4 cup chopped jalapeño (seeds and veins removed)
1 avocado
1 medium sized cucumber
2 tablespoons of toasted sesame seeds
8 toasted nori sheets

For Mexican Spicy Mayo:
2 tablespoons of mayonnaise (vegan mayo if preferred)
1/2 teaspoon of Sriracha sauce
3 tablespoons of my Salsa de Jitomate

Other topping:
Unagi (eel) Sauce
I’ve found that this sauce is actually not really made from eel, yay!

- Wash your sushi rice very well under cold water, until water runs clear.
- Place rice in a pot and add water. Bring water to a boil under high heat and immediately lower heat to lowest setting and cover.
- Cook rice for about 10 minutes until water is dissolved then turn off heat and leave covered for about 20 minutes. IMPORTANT: NO Peeking!!! You want all of the steam to finish cooking the rice until soft.
- In the meantime, chop your onion, cilantro, and jalapeño. Set aside for later.
- Cut your avocado in half and remove the pit. Now using the tip of your knife slice your avocado while it’s still in the skin. Once sliced, take a spoon and gently push it in closets to the skin and scoop it out. This will allow you to remove the avocado from the skin and the slices will be perfect. Do the same with the other avocado half.
- Cut your cucumber in half (long ways) and remove all the seeds with a spoon. Now julienne them a little thick.
- Your rice should be ready by now. Open the lid and move to a large container, preferably a wood bowl where you can spread out your rice.
- Add the sushi vinegar over the rice and mix. Fan out your rice until cooled (don’t let it become cold).
- Now you are ready to make your maki rolls:
- Place a nori sheet on top of your sushi mat.
- Wet your hands with cold water so rice doesn’t stick to you.
- Add rice and press onto your nori sheet covering almost all of it. Make sure you get all the edges too. Leave a 1/4 of an inch section on the bottom without rice (will help adhere when rolled).
- Sprinkle sesame seeds all over your rice.
- Add your ingredients: avocado, cucumber, cilantro, onion, and jalapeño.

- You are now ready to roll! Make sure you are rolling tightly. When you get to the end, add water with your finger to the 1/4 inch of the nori with no rice. Roll all the way and tighten with your sushi mat.
- Cut your roll into pieces
- For the Mexican Spicy Mayo: Mix mayo, Sriracha, and Salsa de Jitomate all together until completely blended.
- Top your sushi pieces with eel sauce and your spicy mayo.
Provecho!


Feel free to post your comments or questions.

All content © 2013 AdrianaGuillen.com  All rights reserved. You may not take any images or content from this site without written permission.

Enchiladas Placeras

When I was a child my mom would always allow me choose the meal to be served ay my birthday parties. Since I knew that the meal I chose would be cooked by my mom I always asked for her Enchiladas Placeras.

Enchiladas Placeras, which are potato enchiladas, are the enchiladas you will find all over Guanajuato, Mexico.  On rare occasions, you will also find some enchiladas made with chicken and salsa verde but these are the enchiladas you will find in my part of Mexico. To be honest I didn’t know what cheese enchiladas drenched in sauce were until I came to the United States; must I say I was I disappointed.

So without further-a-do here is the recipe for my favorite Enchiladas Placeras:

Yields: approximately 10 enchiladas

Ingredients for guajillo sauce:
6 chiles guajillos
2 garlic
2 teaspoons cumin
1 teaspoon black pepper
3/4 teaspoon salt
2/3 cup of chiles boiling liquid

Ingredients for stuffing:
10 corn tortillas
2 large potatoes or 4 small (I prefer yellow potatoes)
1/2 teaspoon salt
4 tablespoons of corn oil

Ingredients for garnishing salad:
1 vine ripe tomato, diced
1 small onion, diced
1 1/2 cups chopped cabbage
1 lime
Salt to taste

Toppings:
Salsa de Jitomate
Crema Agria


Before we get started I must state this: please do not substitute any of the ingredients as you will loose the unique flavor (specially in the corn tortillas as opposed to flour tortillas)

- First, mix your diced tomatoes, onions, and cabbage in a bowl. Add the juice of 1 lime and salt to taste. Set aside and allow lime to pickle the ingredients while you cook.
- Remove all stems from guajillo chiles. Open up and remove all seeds and veins while cutting up into pieces with your hands.
- Boil about 1 quart of water and add the dried chiles.  Hydrate for about 5-7 minutes and remove from heat.
- Place all chiles in blender and add garlic, cumin, black pepper, salt, and liquid from the chiles. Blend until very smooth.
- Once sauce is very smooth, strain in a fine mesh strainer to remove all chile skins.
- While creating the guajillo sauce, boil your potatoes, with the skin, in water until fully cooked.
- Once potatoes are cooked, remove skins, add salt, and smash like mashed potatoes. Consistency should be soft and fluffy.
- Heat your tortillas in a skillet, comal, or direct heat, however you prefer. Make sure not to steam them as you want them to be a bit tough. Otherwise, your tortillas will break when in oil.
- In a deep skillet or wok (yes we have wok like pans in Mexico made from both metal and terracotta, they are called Cazos) heat about 2 tablespoons of corn oil.  Leaving the other 2 tablespoons for replenishing the oil as you cook.   There should only be enough oil to coat the bottom of the wok.
- Dip one tortilla at a time into the guajillo sauce, making sure to coat both sides evenly.

- Gently place the tortilla with sauce in the wok with oil and allow it to fry for about 10 seconds.  Flip the tortilla with a spatula (don’t use tongs) and fry the second side for another 10 seconds.  Remember, you are not deep frying the tortilla you are just allowing it to touch the oil gently to adhere the sauce and change the flavor.

- Remove the tortilla and place in a plate. Fill the tortilla with the mashed potatoes and roll tightly but gently.
- Continue doing this until you have completed all 10 enchiladas.
*HINT* I find it easier to make all the tortillas first, place them one on top of the other as you gently fry them, and then stuff them one by one. It’s also much faster.
- Once you have your tortillas you can plate them as you wish using making sure to add the garnishing salad, salsa de Jitomate, and crema agria. If you would like to use sour cream instead of Mexican crema agria, I would suggest that you dilute it with a touch of whole milk and add some salt to it first.

Enjoy!


Feel free to post your comments or questions.

All content © 2013 AdrianaGuillen.com  All rights reserved. You may not take any images or content from this site without written permission.

Salsa Taquera

This salsa is my favorite for a delicious simple bean and cheese burrito. However, it’s great on all tacos, hence the name.

Yields Approximately: 2 cups

Ingredients
- 5 tomatoes (very ripe)
- 8 Puya chillies
- 1 clove of garlic
- 2 teaspoons of cumin
- 1/2 teaspoon of oregano

- On a medium hot skillet, roast tomatoes. Making sure that you are cooking the tomatoes as well as roasting. Do this by rotating them and roasting on all sides.
- Boil about 2 quarts of water and hydrate the puya chiles for about 5 minutes.

- Once tomatoes are roasted remove from heat.
- Remove most of the blackened tomato peel.

- Place all tomatoes and chiles in blender. Add peeled garlic, cumin, and oregano and blend until smooth or desired consistency.
- Add salt to taste

All done!!


Feel free to post your comments or questions,.

All content © 2013 AdrianaGuillen.com  All rights reserved. You may not take any images or content from this site without written permission.

Salsa de Jitomate (Roasted Tomato Salsa)

Try this salsa on grilled tofu or for non-vegetarians on carne asada or any steak.

Yields Approximately: 2 Cups

Ingredients
-  5 large tomatoes (make sure they are perfectly ripened)
-  4 jalapeños
- Salt to taste

- On a medium hot skillet, roast tomatoes and jalapeños. Making sure that you are cooking the tomatoes as well as roasting. Do this by rotating them and roasting on all sides. Otherwise you end up with a raw tomato on the inside.

- Once roasted, peel tomatoes and jalapeños as much as possible leaving some of the roasted skin.
- Blend all until smooth and all salt to taste.

Can it get any easier? It sounds crazy to only use those ingredients, I know, but trust me it doesn’t need much else. Using simple ingredients is what makes a difference between an Americanized salsa and real homemade Mexican food.

Feel free to post your comments or questions.  

All content © 2013 AdrianaGuillen.com  All rights reserved. You may not take any images or content from this site without written permission.